4.1. Simulation examples with V-REP
The following examples demonstrate the V-REP simulation backend. They are based on a sample scene of the Robotic Fabrication Lab (RFL).
Before running them, make sure you have configured the V-REP backend correctly.
4.1.1. First step
The first step is just connect to the simulator and verify the connection is working.
Copy and paste the following example into any Python environment
(a standalone script, a CAD environment, etc) and run it, you should
see the output Connected: True if everything is working properly:
from compas_fab.backends import VrepClient

with VrepClient() as client:
    print ('Connected: %s' % client.is_connected)
4.1.2. Forward Kinematics
4.1.2.1. Moving robots
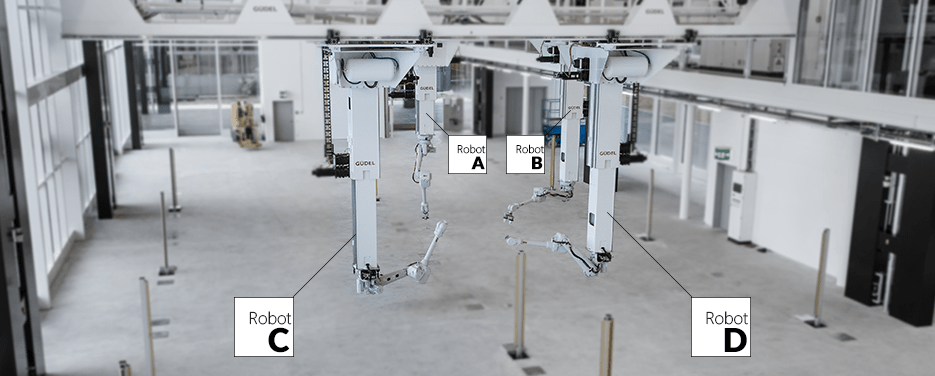
The RFL scene used on these examples has 4 robots that can be
referenced by the identifiers: A, B, C and D.

When planning on a multi-robotic cell, it’s important to make sure all robots on the cell are positioned correctly and not colliding with each other at start, otherwise path planning will fail.
The state of a robot is specified as an instance of
compas_fab.robots.Configuration.
Here’s a simple example on how to position two of the robots using forward kinematics:
from compas_fab.robots import *
from compas_fab.robots import rfl
from compas_fab.backends import VrepClient

config_robot_a    = Configuration.from_prismatic_and_revolute_values([8.260, -1.000, -3.690],
                                                                     to_radians([190, 0, 0, 0, 90, 0]))

config_robot_b    = Configuration.from_prismatic_and_revolute_values([8.260, -8.320, -3.690],
                                                                     to_radians([190, 0, 0, 0, 90, 0]))

with VrepClient() as client:
    robot_a = rfl.Robot('A')
    robot_b = rfl.Robot('B')
    client.set_robot_config(robot_a, config_robot_a)
    client.set_robot_config(robot_b, config_robot_b)
    group_a = robot_a.model.attr['index']
    group_b = robot_b.model.attr['index']

    frame_a = client.forward_kinematics(robot, None, group=group_a)
    frame_b = client.forward_kinematics(robot, None, group=group_b)
    print('End effector poses: ', str(frame_a), str(frame_b))
4.1.3. Inverse Kinematics
When the configuration required to reach a certain frame with a robot is not know, we use inverse kinematics to resolve it and find a suitable pose. The following example shows how to calculate this. In this case, it will take collisions into account, but does not find a path to the goal pose, only that there is at least one valid configuration to reach the goal pose.
from compas.geometry import Frame
from compas_fab.robots import rfl
from compas_fab.backends import VrepClient

goal_pose = Frame((8.110, 7.020, 1.810), (-1, 0, 0), (-0, -0, -1))

with VrepClient() as client:
    robot = rfl.Robot('B')
    group = robot.model.attr['index']
    options = {
        'num_joints': len(robot.get_configurable_joints()),
    }
    configs = client.inverse_kinematics(robot, goal_pose, group=group, options=options)

    assert len(configs) > 0, 'No IK solution found'
    print('Found valid configuration: ', str(configs[-1]))
4.1.4. Path planning
Calculating a path plan requires several parameters to be configured in order to start the process. In its minimal expression, a path planning request must define a start configuration and a goal pose and rely on defaults for the rest.
Here is an example of such a request:
from compas.geometry import Frame
from compas_fab.robots import *
from compas_fab.robots import rfl
from compas_fab.backends import VrepClient

start_config    = Configuration.from_prismatic_and_revolute_values([8.260, -5.320, -3.690],
                                                                   to_radians([-143, 37, -112, 0, -15, -126]))
goal_pose       = Frame((8.110, 7.020, 1.810), (-1, 0, 0), (-0, -0, -1))

with VrepClient() as client:
    robot = rfl.Robot('B')
    group = robot.model.attr['index']
    client.set_robot_config(robot, start_config)
    path = client.plan_motion(robot, goal_pose, group=group)
    print('Found path of %d steps' % len(path))
A more elaborate request takes several additional parameters to control the planning process:
import logging

from compas.datastructures import Mesh
from compas.geometry import Frame

import compas_fab
from compas_fab.robots import *
from compas_fab.robots import rfl
from compas_fab.backends import VrepClient

# Configure logging to DEBUG to see detailed timing of the path planning
logging.basicConfig(level=logging.DEBUG)

# Configure parameters for path planning
start_pose      = Frame((7.453, 2.905, 0.679), (1, 0, 0), (0, -1, 0))
goal_pose       = Frame((5.510, 5.900, 1.810), (0, 0, -1), (0, 1, 0))
planner_id      = 'rrtconnect'
max_trials      = 1
resolution      = 0.02
building_member = Mesh.from_obj(compas_fab.get('planning_scene/timber_beam.obj'))
structure       = [Mesh.from_obj(compas_fab.get('planning_scene/timber_structure.obj'))]
metric          = [0.1] * 9
fast_search     = True

with VrepClient(debug=True) as client:
    robot = rfl.Robot('A', client=client)
    client.planner.pick_building_member(robot, building_member, start_pose)
    group = robot.model.attr['index']

    path = client.plan_motion(robot,
                              goal_pose,
                              group=group,
                              options={
                                  'metric_values': metric,
                                  'collision_meshes': structure,
                                  'planner_id': planner_id,
                                  'trials': max_trials,
                                  'resolution': resolution,
                                  'shallow_state_search': fast_search,
                              })

    print('Found path of %d steps' % len(path))

    assert len(path) > 0, 'Path should not be empty'
4.1.5. Grasshopper integration

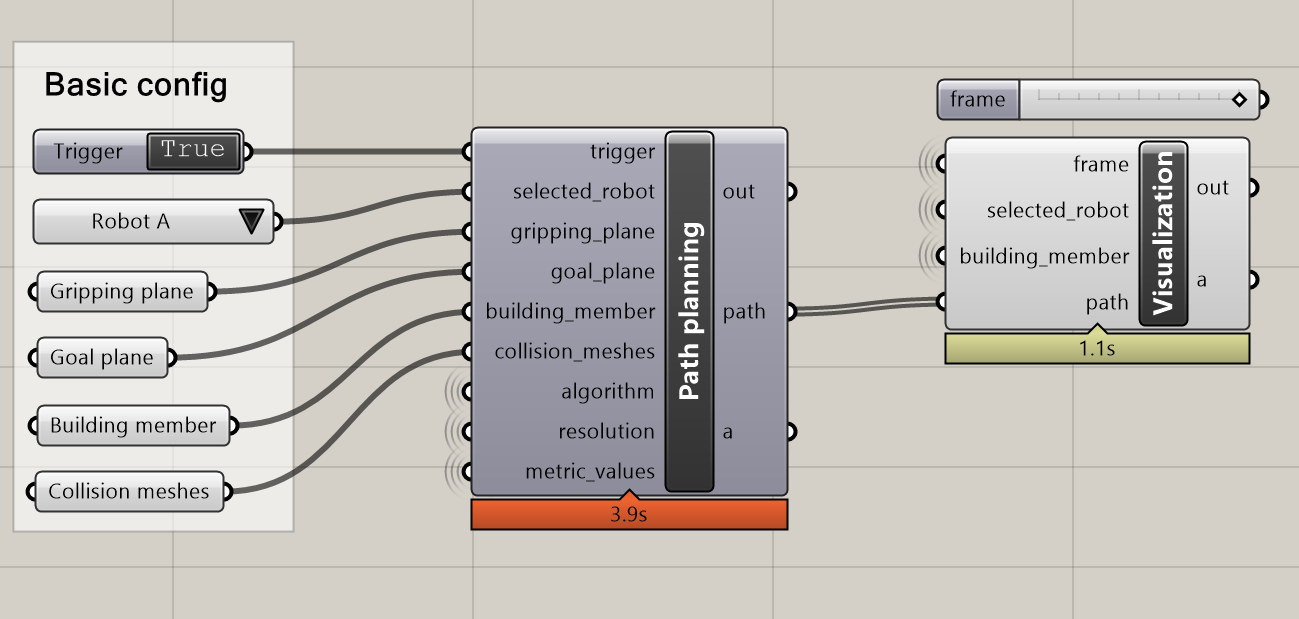
Besides the examples above that can be run standalone or inside CAD software, this package contains a ready-made integration for Grasshopper that allows configuration of most available parameters.