Creating a MoveIt! package from the custom created URDF
This example is mainly copied from MoveIt! Setup Assistant Tutorial
It is based on the previous example: Creating a URDF with an UR5 robot and a custom end-effector
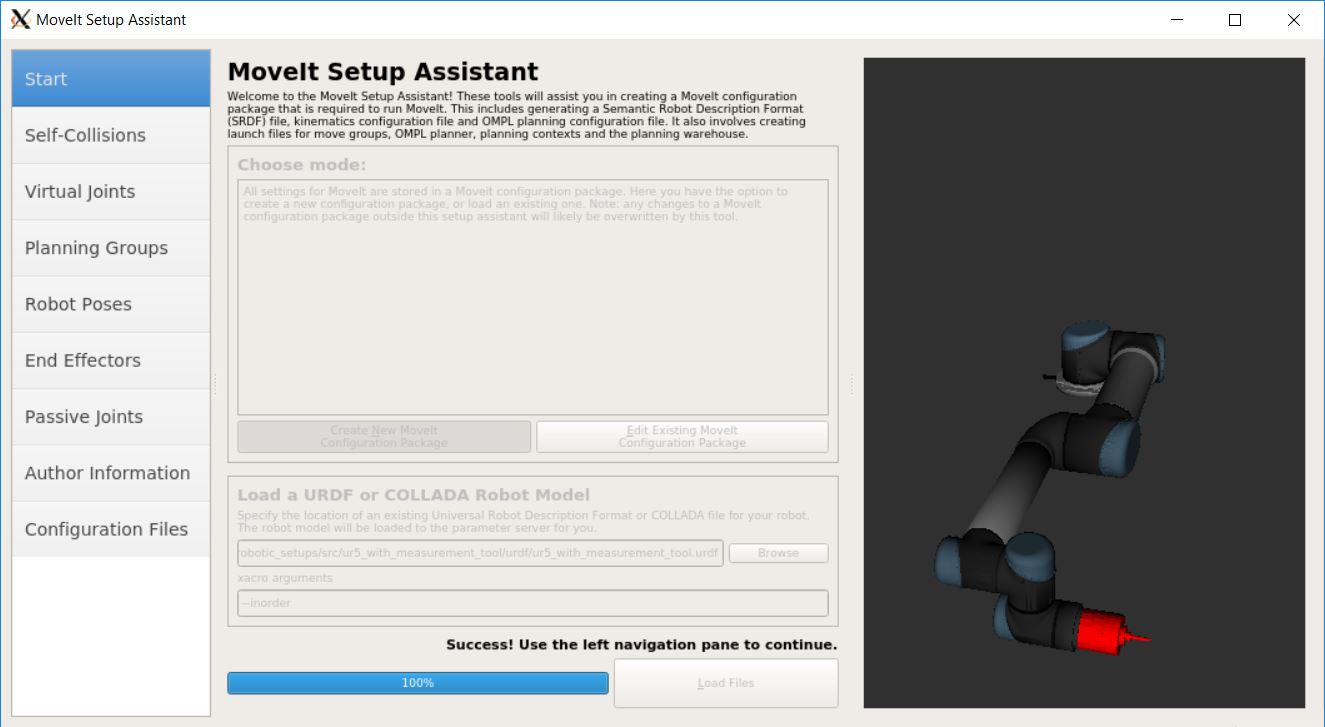
Start the MoveIt! Setup Assistant
The MoveIt! Setup Assistant is a graphical user interface for configuring any robot for use with MoveIt!. Its primary functions are to generate a Semantic Robot Description Format (SRDF) file, to create the collision matrix of your robot and to define the planning groups.
To start the MoveIt! Setup Assistant, launch the following from your Linux command prompt:
roslaunch moveit_setup_assistant setup_assistant.launchPress Create New MoveIt Configuration Package
Click on the browse button and navigate to the
ur5_with_measurement_tool.urdffile you created in the last example. Choose that file and then click Load Files. The Setup Assistant will load the files (this might take a few seconds) and present you with this screen:
Generate Self-Collision Matrix
Click on the Self-Collisions pane selector on the left-hand side.
Click on the Generate Collision Matrix button. The Setup Assistant will work for a few seconds before presenting you the results of its computation in the main table.
- Note:
The sampling density specifies how many random robot positions to check for self collision. The default value of 10’000 collision checks should be fine.

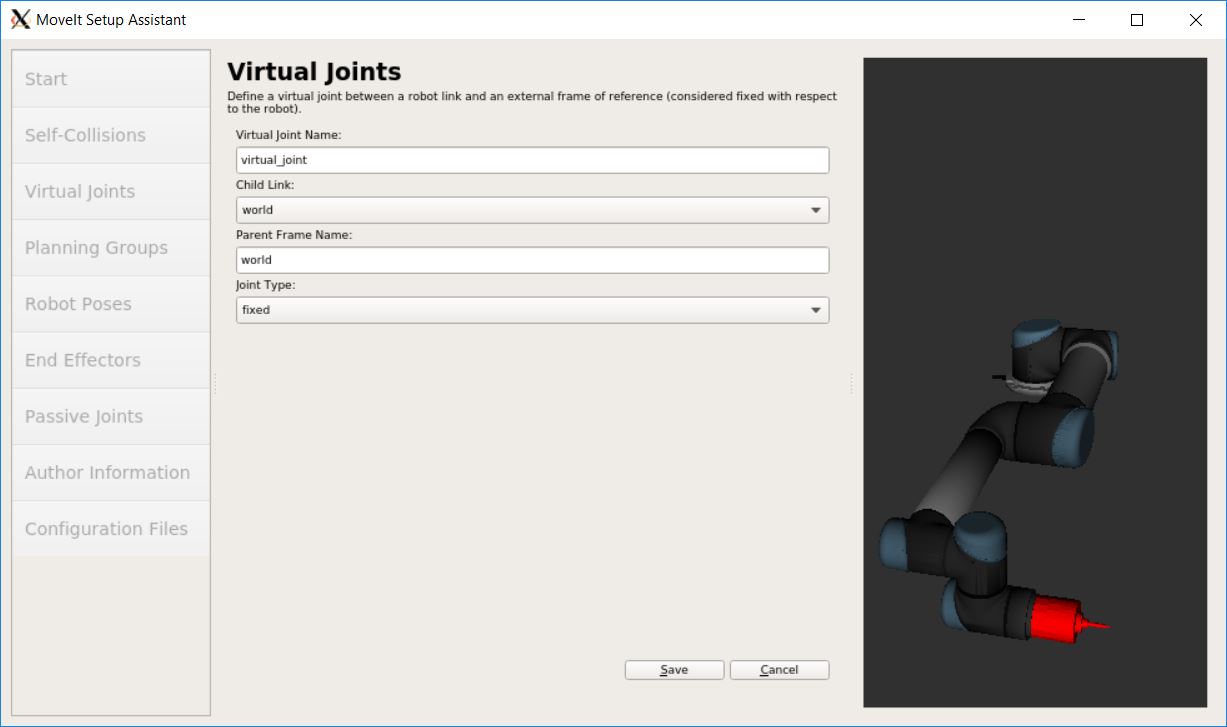
Add Virtual Joints
Virtual joints are used primarily to attach the robot to the world coordinate
frame. We will define only one virtual joint, attaching the
ur5_with_measurement_tool to the world coordinate frame.
Click on the Virtual Joints pane selector. Click on Add Virtual Joint
Set the joint name as “virtual_joint”
Set the child link as “world” and the parent frame name as “world”.
Set the Joint Type as “fixed”.
Click Save.
Add Planning Groups
Planning groups are used for semantically describing different parts of your robot, such as defining what an arm is, or an end-effector. The planning group is later used for path- and motion planning.
Click on the Planning Groups pane selector.
Click on Add Group and you should see the following screen:
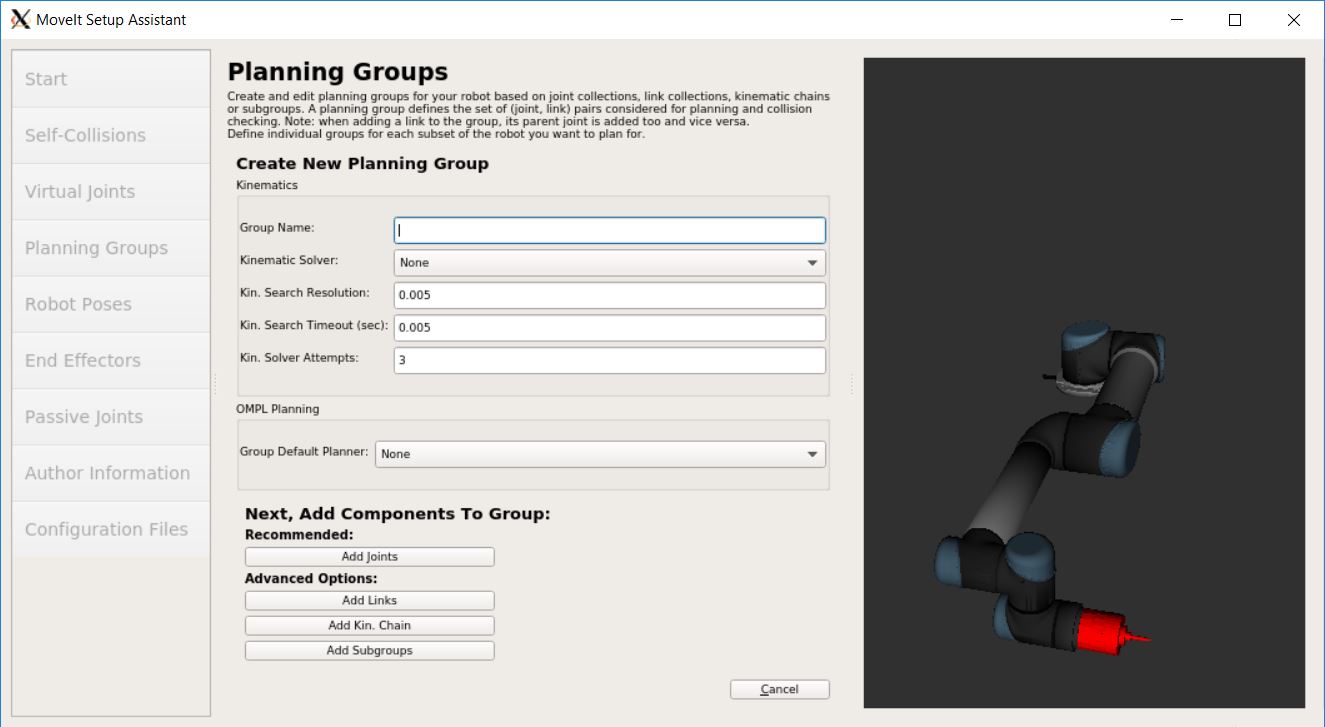
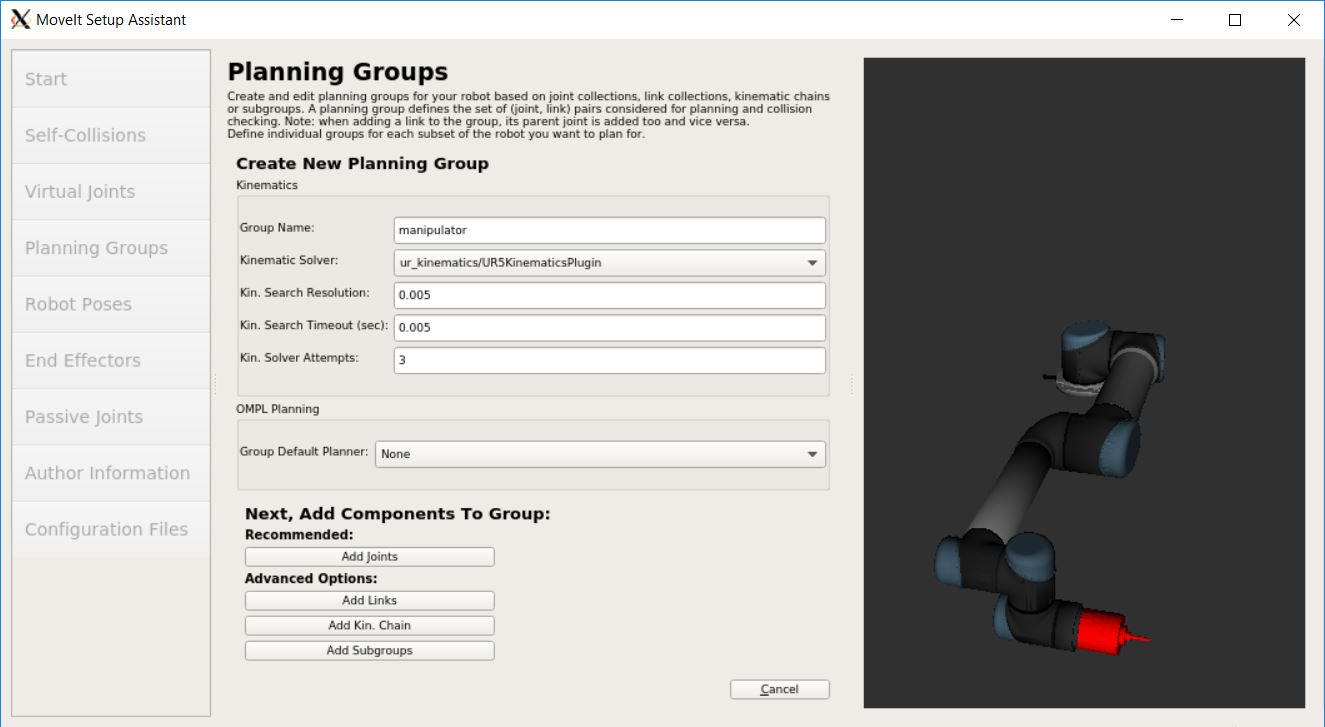
Add the arm
Enter Group Name as “manipulator”
Choose ur_kinematics/UR5KinematicsPlugin as the kinematics solver.
Let Kin. Search Resolution, Kin. Search Timeout (sec), Kin. Solver Attempts and Group Default Planner stay at their default values.
Click on the Add Kin. Chain button. Press Expand All
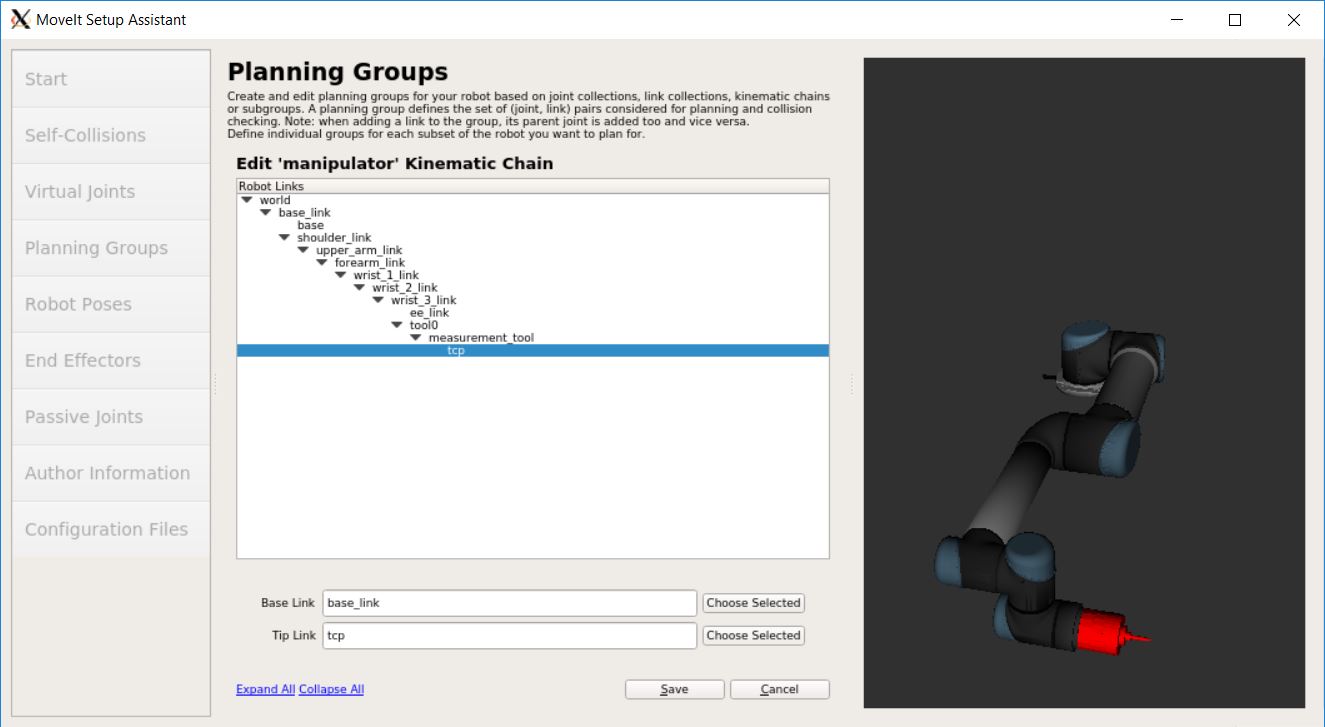
Select the “base_link” as Base Link and the “tcp” as Tip Link
Press the Save button.
Add the gripper
We will also add a group for the end-effector.
Note
You will do this using a different procedure than adding the arm.
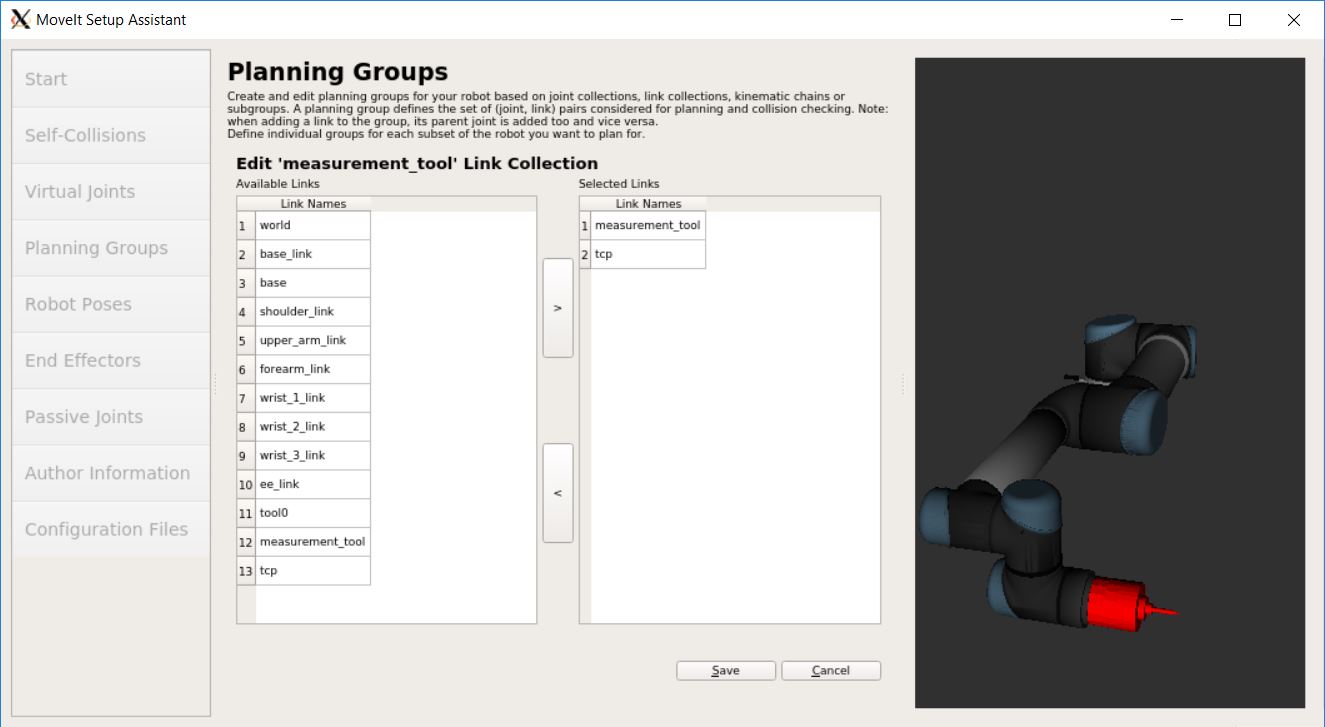
Click on the Add Group button.
Enter Group Name as “measurement_tool”
Let Kinematic Solver, Kin. Search Resolution, Kin. Search Timeout (sec), Kin. Solver Attempts and Group Default Planner stay at their default values.
Click on the Add Links button.
Choose measurment_tool and tcp (The links you defined in the measurement_tool.xacro) and add them to the list of Selected Links on the right hand side.
Click Save
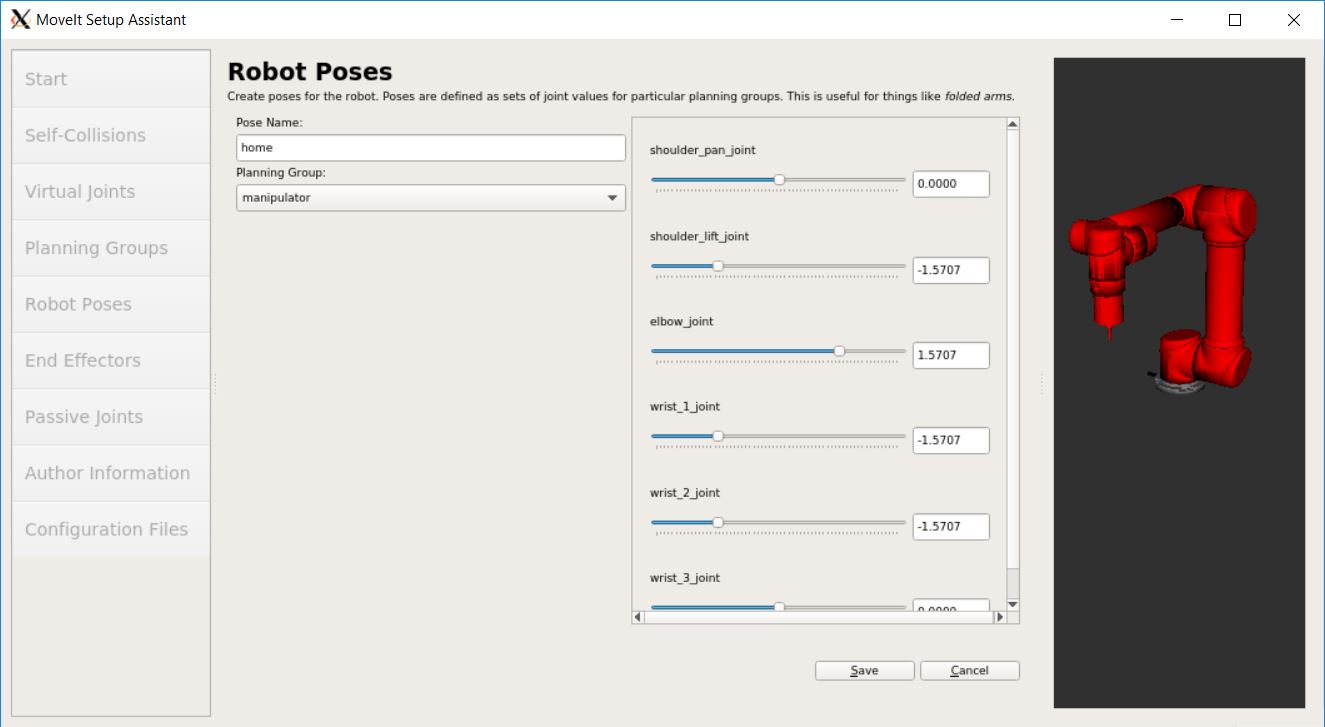
Add Robot Poses
The Setup Assistant allows you to add certain fixed poses into the configuration. This helps if, for example, you want to define a certain position of the robot as a Home position.
Click on the Robot Poses pane.
Click Add Pose. Choose a name for the pose. The robot will be in its Default position where the joint values are set to the mid-range of the allowed joint value range. Move the individual joints around until you are happy and then Save the pose.
- Tip:
Try to move all the joints around. If there is something wrong with the joint limits in your URDF, you should be able to see it immediately here.
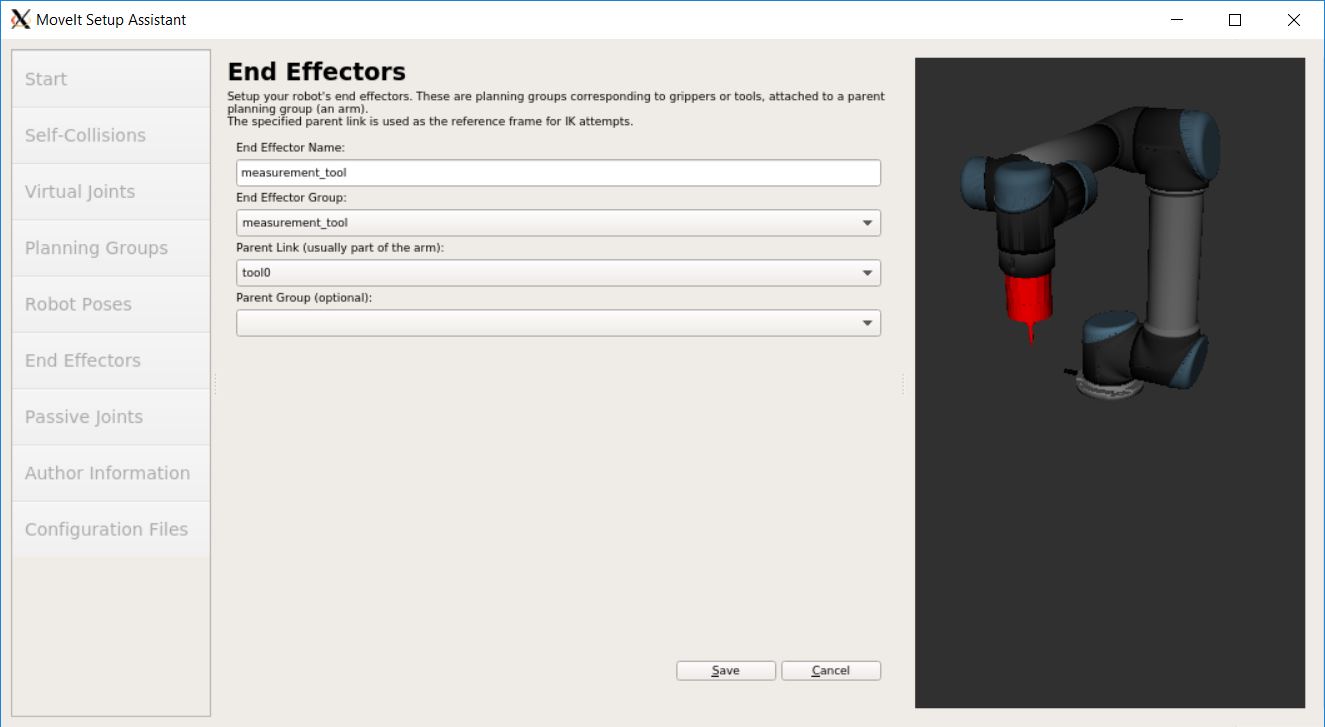
Label End-Effectors
We have already added the measurement_tool of the ur5. Now, we will designate this group as a special group: end effectors.
Click on the End Effectors pane.
Click Add End Effector.
Choose
measurement_toolas the End Effector Name for the measurement tool.Select “measurement_tool” as the End Effector Group.
Select “tool0” as the Parent Link for this end-effector.
Leave Parent Group empty.
Press Save.
Add Passive Joints
Skip this step.
Generate Configuration Files
You are almost there. One last step!
Click on the Configuration Files pane.
Click Browse, select the
robotic_setups/srclocation. Click Create New Folder, call it “ur5_with_measurement_tool_moveit_config”, and click Choose.Click on the Generate Package button. The Setup Assistant will now generate and write a set of launch and config files into the directory of your choosing. All the generated files will appear in the Generated Files/Folders tab and you can click on each of them for a description of what they contain.

Start the newly generated MoveIt! Configuration
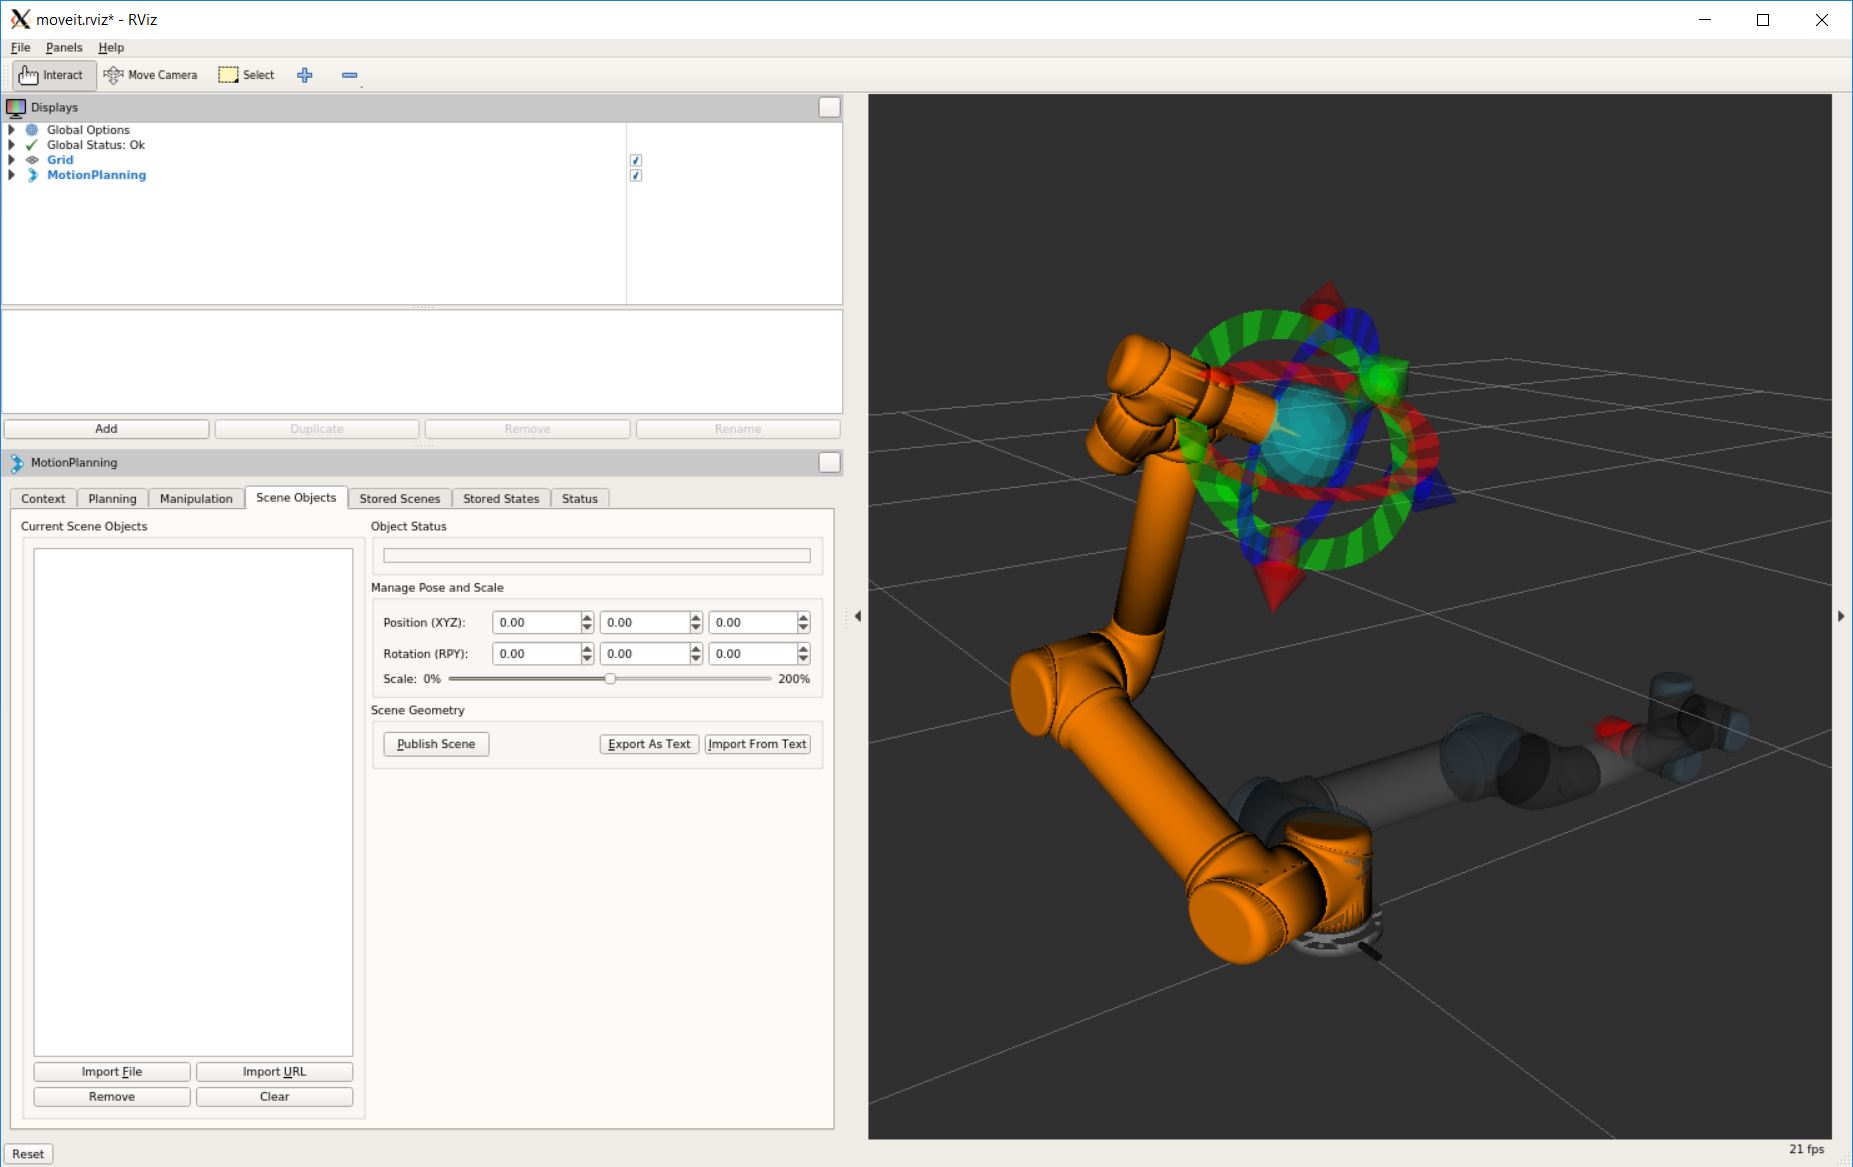
Now, optionally, you can already start the MoveIt! Demo and play:
cd ~/robotic_setups
catkin_make
source devel/setup.bash
roslaunch ur5_with_measurement_tool_moveit_config  demo.launch rviz_tutorial:=true